Django + Postgres + AWS RDS: A Step-by-Step Guide
Introduction
Embark on a journey to seamlessly integrate Django, Postgres, and AWS RDS in our latest step-by-step guide. This tutorial is tailored for developers looking to leverage the robustness of Django with the reliability of Postgres and the scalability of AWS RDS. Discover how to set up a dynamic web application environment that harnesses the power of these technologies, enhancing your development and deployment workflow.
What You Will Learn
By the end of this tutorial, you will understand:
- Django: You will how to connect Django to PostgreSQL databases.
- AWS RDS: You will understand AWS and how to spin up RDS databases.
- Networking: You will understand VPC networks to allow for public access.
- Terraform: How to use Terraform to create, update and destroy cloud resources.
Prerequisites
Before starting the tutorial, make sure you have the following prerequisites installed and set up on your computer:
- Python 3.10+ (we’ll use 3.12):
- Mac: Install Python using Homebrew with
brew install python@3.12. This will install Python 3.12 and pip. - Windows: Download the Python 3.12 installer from the official Python website.
- AWS:
- Account: Head to AWS to login or sign up. Make sure you have a Credit Card linked to the account (even this tutorial is essentially free).
- CLI v2: Head to the AWS CLI documentation to install v2 of the AWS CLI.
- Terraform CLI:
- Mac: Follow the download instructions for Terraform Mac OSx. You can also just run
brew tap hashicorp/tapandbrew install hashicorp/tap/terraform. - Windows: Follow the download instructions for Terraform Windows. You can also just run
choco install terraform.
Step 1: Setting Up Your Django Project
Now, let’s run Python 3.12 to install Django and create a project:
python3.12 -m pip install django
python3.12 -m django startproject django-rds
cd django-rds
Now, within this folder, we should have the following files:
# Command: tree .
.
├── manage.py
└── django-rds
    ├── __init__.py
    ├── asgi.py
    ├── settings.py
    ├── urls.py
    └── wsgi.py
We now have a proper Django project!
Step 2: Setting Up Your Vitual Environment
With our Django project, let’s setup a virtual environment and install the necessary dependencies!
A virtual environment is useful because it allows you to manage separate dependencies for different projects, preventing conflicts between package versions and ensuring consistency across development and production setups.
Let’s create and run a Python 3.12 virtual environment now:
python3.12 -m venv my-venv
source my-venv/bin/activate
You should now see (my-venv) in your terminal. This means your virtual environment is up and running!
Let’s also install the necessary dependencies and save them to requirements.txt.
pip install --upgrade pip
pip install django psycopg2-binary
pip freeze > requirements.txt
Now we should have a file called requirements.txt which lists out needed dependencies.
Step 3: Running the local database
Now that our Django Project is configured, lets run Django with our local database and an admin user.
./manage.py migrate
./manage.py createsuperuser # follow the steps
./manage.py runserver
We can go to http://127.0.0.1:8000/admin to test our user was written into our db.sqlite3 database.
Step 4: Setting up Terraform
Instead of clicking around the AWS console, we’re going to define our environment with Terraform and run apply to create this blueprint in the cloud.
First, lets get your AWS credentials to start using Terraform on your machine.
Head to the AWS Console > Your Account > Security Credentials to create a new key-pair.
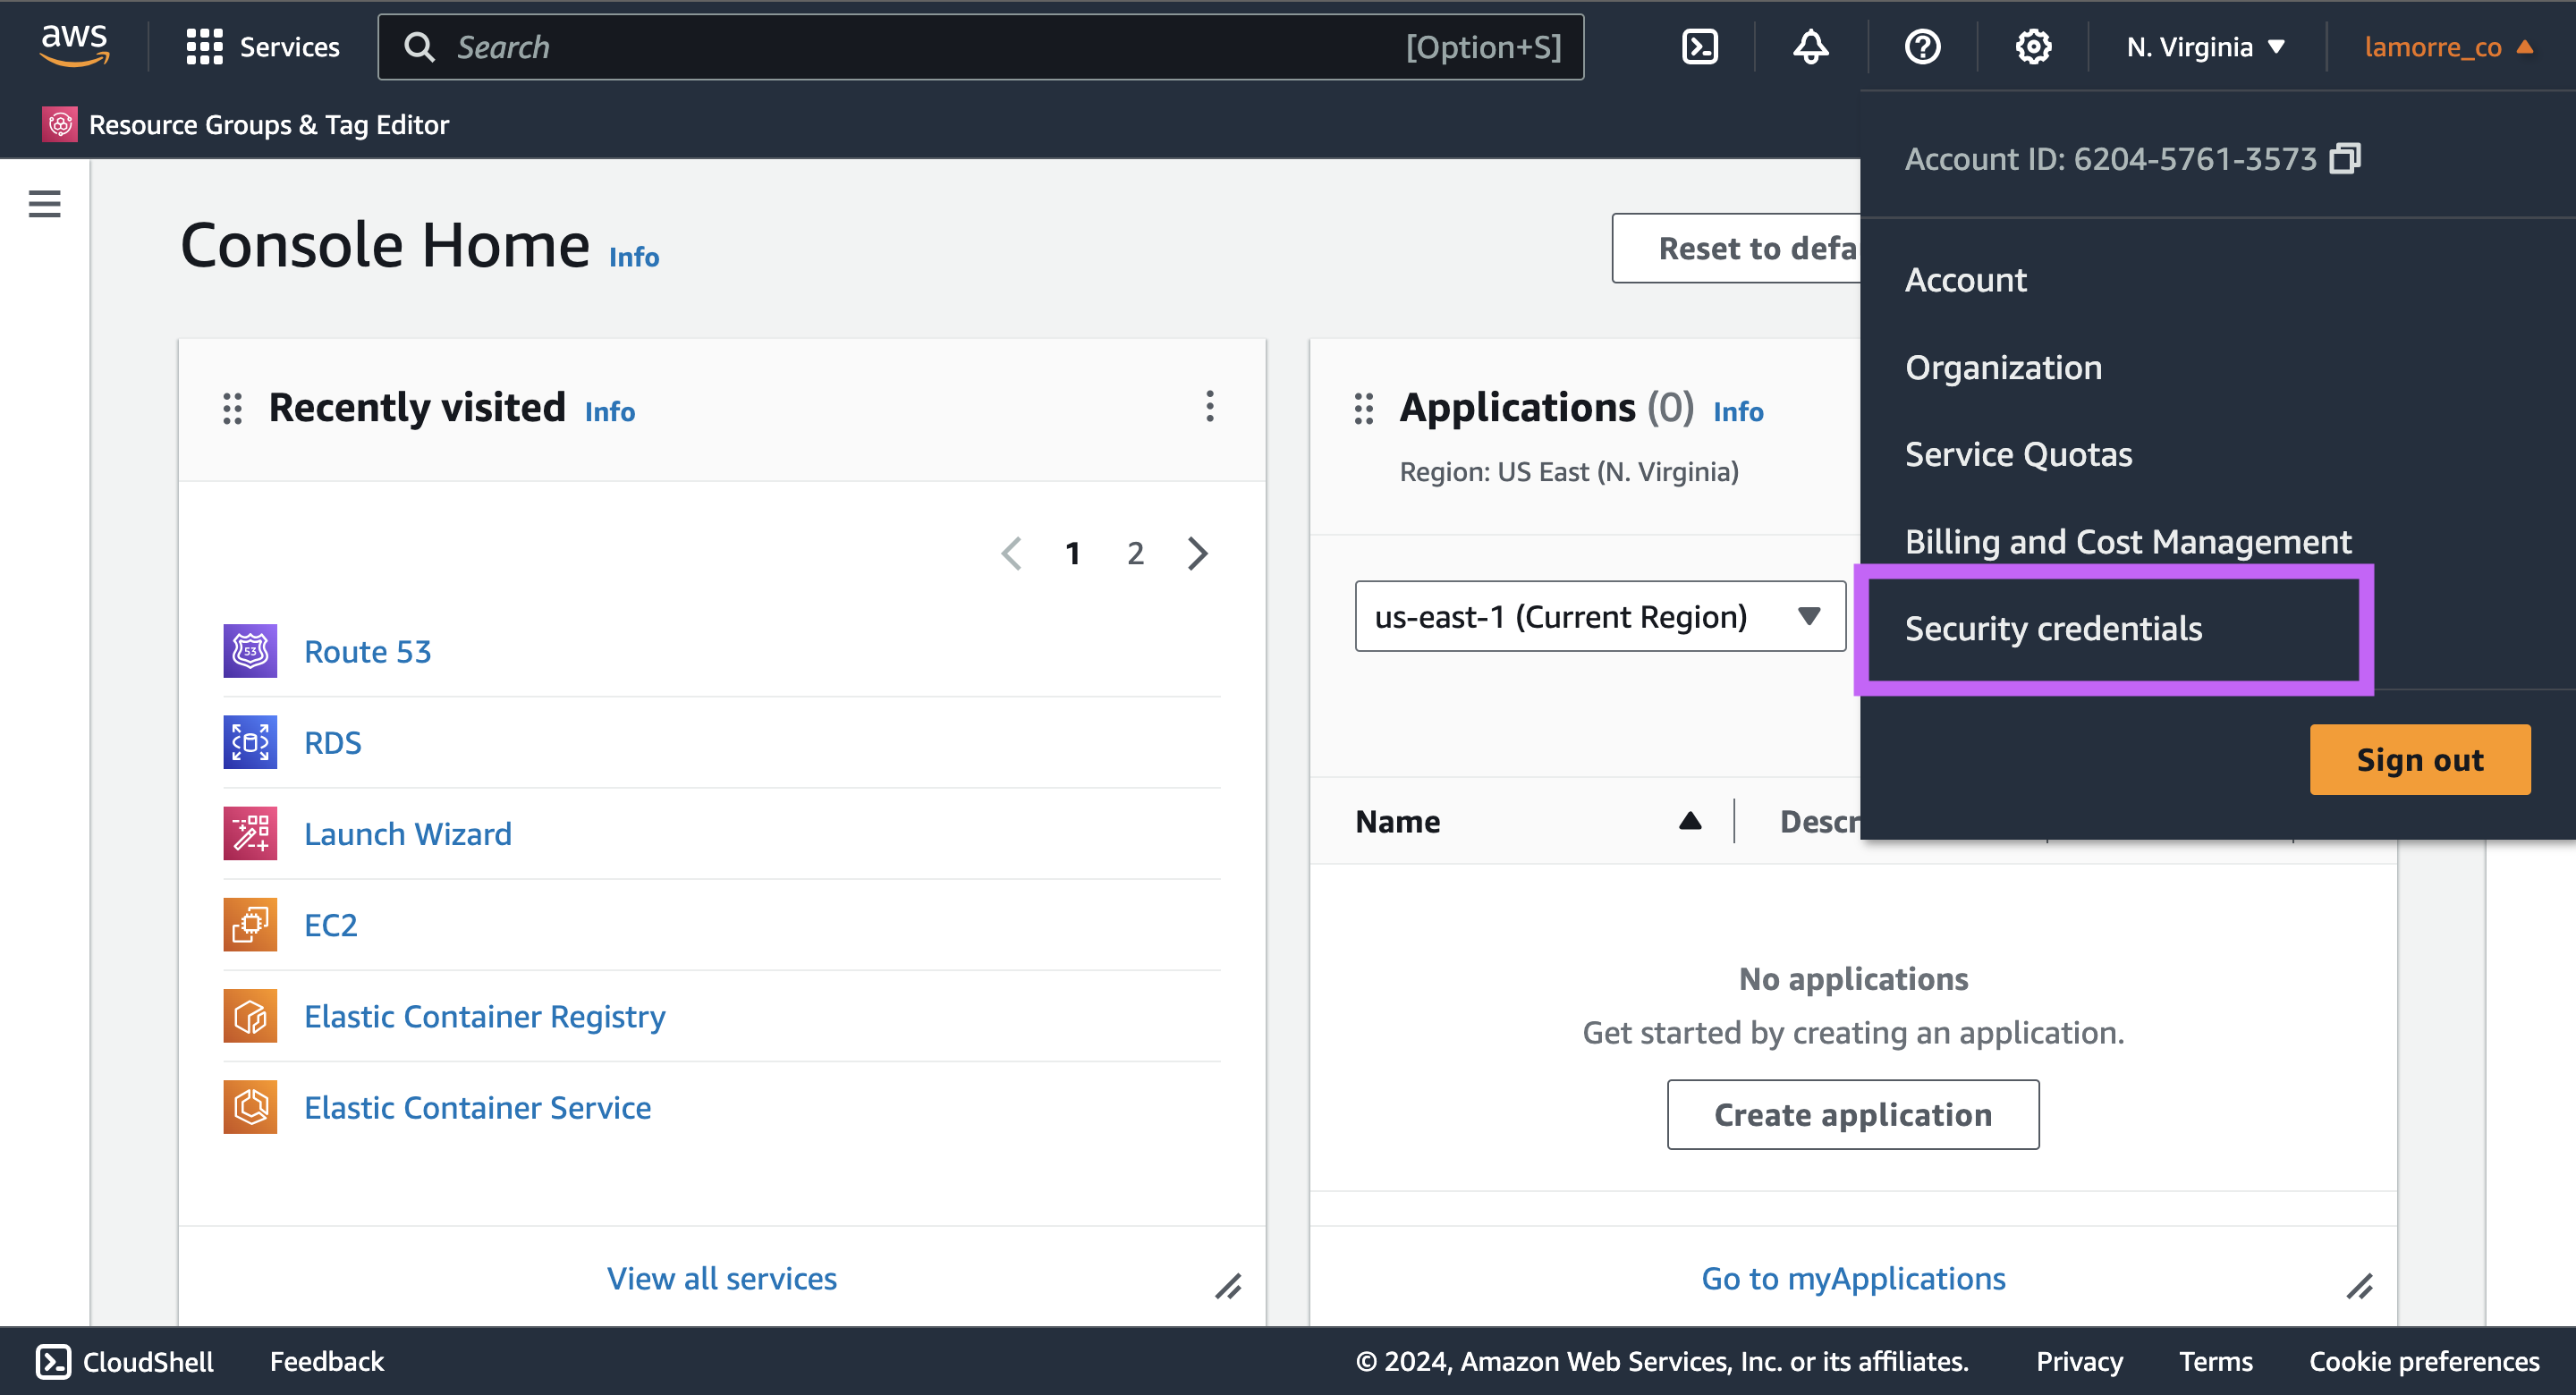
Then click on “Create access key” and follow the steps.
We’ll set the keys as local environment variables. We can do so with the following commands:
MacOS or Linux
export AWS_ACCESS_KEY_ID="your_access_key"
export AWS_SECRET_ACCESS_KEY="your_secret_key"
Windows
set AWS_ACCESS_KEY_ID=your_access_key
set AWS_SECRET_ACCESS_KEY=your_secret_key
Step 5: Writing the Terraform Modules
Create a main.tf file in the root of your Django project.
Below are all the terraform modules and an explanation for each part:
# Define AWS provider and set the region for resource provisioning
provider "aws" {
  region = "us-east-1"
}

# Create a Virtual Private Cloud to isolate the infrastructure
resource "aws_vpc" "default" {
  cidr_block           = "10.0.0.0/16"
  enable_dns_support   = true
  enable_dns_hostnames = true
  tags = {
    Name = "DjangoRDSVPC"
  }
}

# Internet Gateway to allow internet access to the VPC
resource "aws_internet_gateway" "default" {
  vpc_id = aws_vpc.default.id
  tags = {
    Name = "DjangoRDSInternetGateway"
  }
}

# Route table for controlling traffic leaving the VPC
resource "aws_route_table" "default" {
  vpc_id = aws_vpc.default.id
  route {
    cidr_block = "0.0.0.0/0"
    gateway_id = aws_internet_gateway.default.id
  }
  tags = {
    Name = "DjangoRDSRouteTable"
  }
}

# Subnet within VPC for resource allocation, in availability zone us-east-1a
resource "aws_subnet" "subnet1" {
  vpc_id                  = aws_vpc.default.id
  cidr_block              = "10.0.1.0/24"
  map_public_ip_on_launch = true
  availability_zone       = "us-east-1a"
  tags = {
    Name = "DjangoRDSSubnet1"
  }
}

# Another subnet for redundancy, in availability zone us-east-1b
resource "aws_subnet" "subnet2" {
  vpc_id                  = aws_vpc.default.id
  cidr_block              = "10.0.2.0/24"
  map_public_ip_on_launch = true
  availability_zone       = "us-east-1b"
  tags = {
    Name = "DjangoRDSSubnet2"
  }
}

# Associate subnets with route table for internet access
resource "aws_route_table_association" "a" {
  subnet_id      = aws_subnet.subnet1.id
  route_table_id = aws_route_table.default.id
}

resource "aws_route_table_association" "b" {
  subnet_id      = aws_subnet.subnet2.id
  route_table_id = aws_route_table.default.id
}

# DB subnet group for RDS instances, using the created subnets
resource "aws_db_subnet_group" "default" {
  name       = "docker-django-subnet"
  subnet_ids = [aws_subnet.subnet1.id, aws_subnet.subnet2.id]
  tags = {
    Name = "My DB Subnet Group"
  }
}

# Security group for RDS, allows PostgreSQL traffic
resource "aws_security_group" "default" {
  vpc_id = aws_vpc.default.id
  name        = "DjangoRDSSecurityGroup"
  description = "Allow all inbound traffic for RDS"
  ingress {
    from_port   = 5432
    to_port     = 5432
    protocol    = "tcp"
    cidr_blocks = ["0.0.0.0/0"]
  }
  egress {
    from_port   = 0
    to_port     = 0
    protocol    = "-1"
    cidr_blocks = ["0.0.0.0/0"]
  }
  tags = {
    Name = "allow_all"
  }
}

# Define variable for RDS password to avoid hardcoding secrets
variable "db_password" {
  description = "The password for the database"
  type        = string
  sensitive   = true
}

# RDS instance for Django backend, publicly accessible
resource "aws_db_instance" "default" {
  allocated_storage      = 20
  storage_type           = "gp2"
  engine                 = "postgres"
  engine_version         = "16.1"
  instance_class         = "db.t3.micro"
  identifier             = "my-django-rds"
  db_name                = "DjangoRDSDB"
  username               = "adam"
  password               = var.db_password
  db_subnet_group_name   = aws_db_subnet_group.default.name
  vpc_security_group_ids = [aws_security_group.default.id]
  skip_final_snapshot    = true
  publicly_accessible    = true
  multi_az               = false
  tags = {
    Name = "DjangoRDSRDS"
  }
}
Be sure to set an environment variable for a secure db_password:
export TF_VAR_db_password="your_secure_password"In order to use this terraform code, we have the following commands:
terraform plan # previews what resources will be created
terraform apply # applies the changes in the cloud (Create, Update, Destroy)
terraform destroy # destroys all resources created by these terraform files
Once we run terraform apply we should see a publicly accessible RDS instance. Search for “RDS” in the AWS console and go to “Databases”.
You should see a database called “my-django-rds-inctance”.
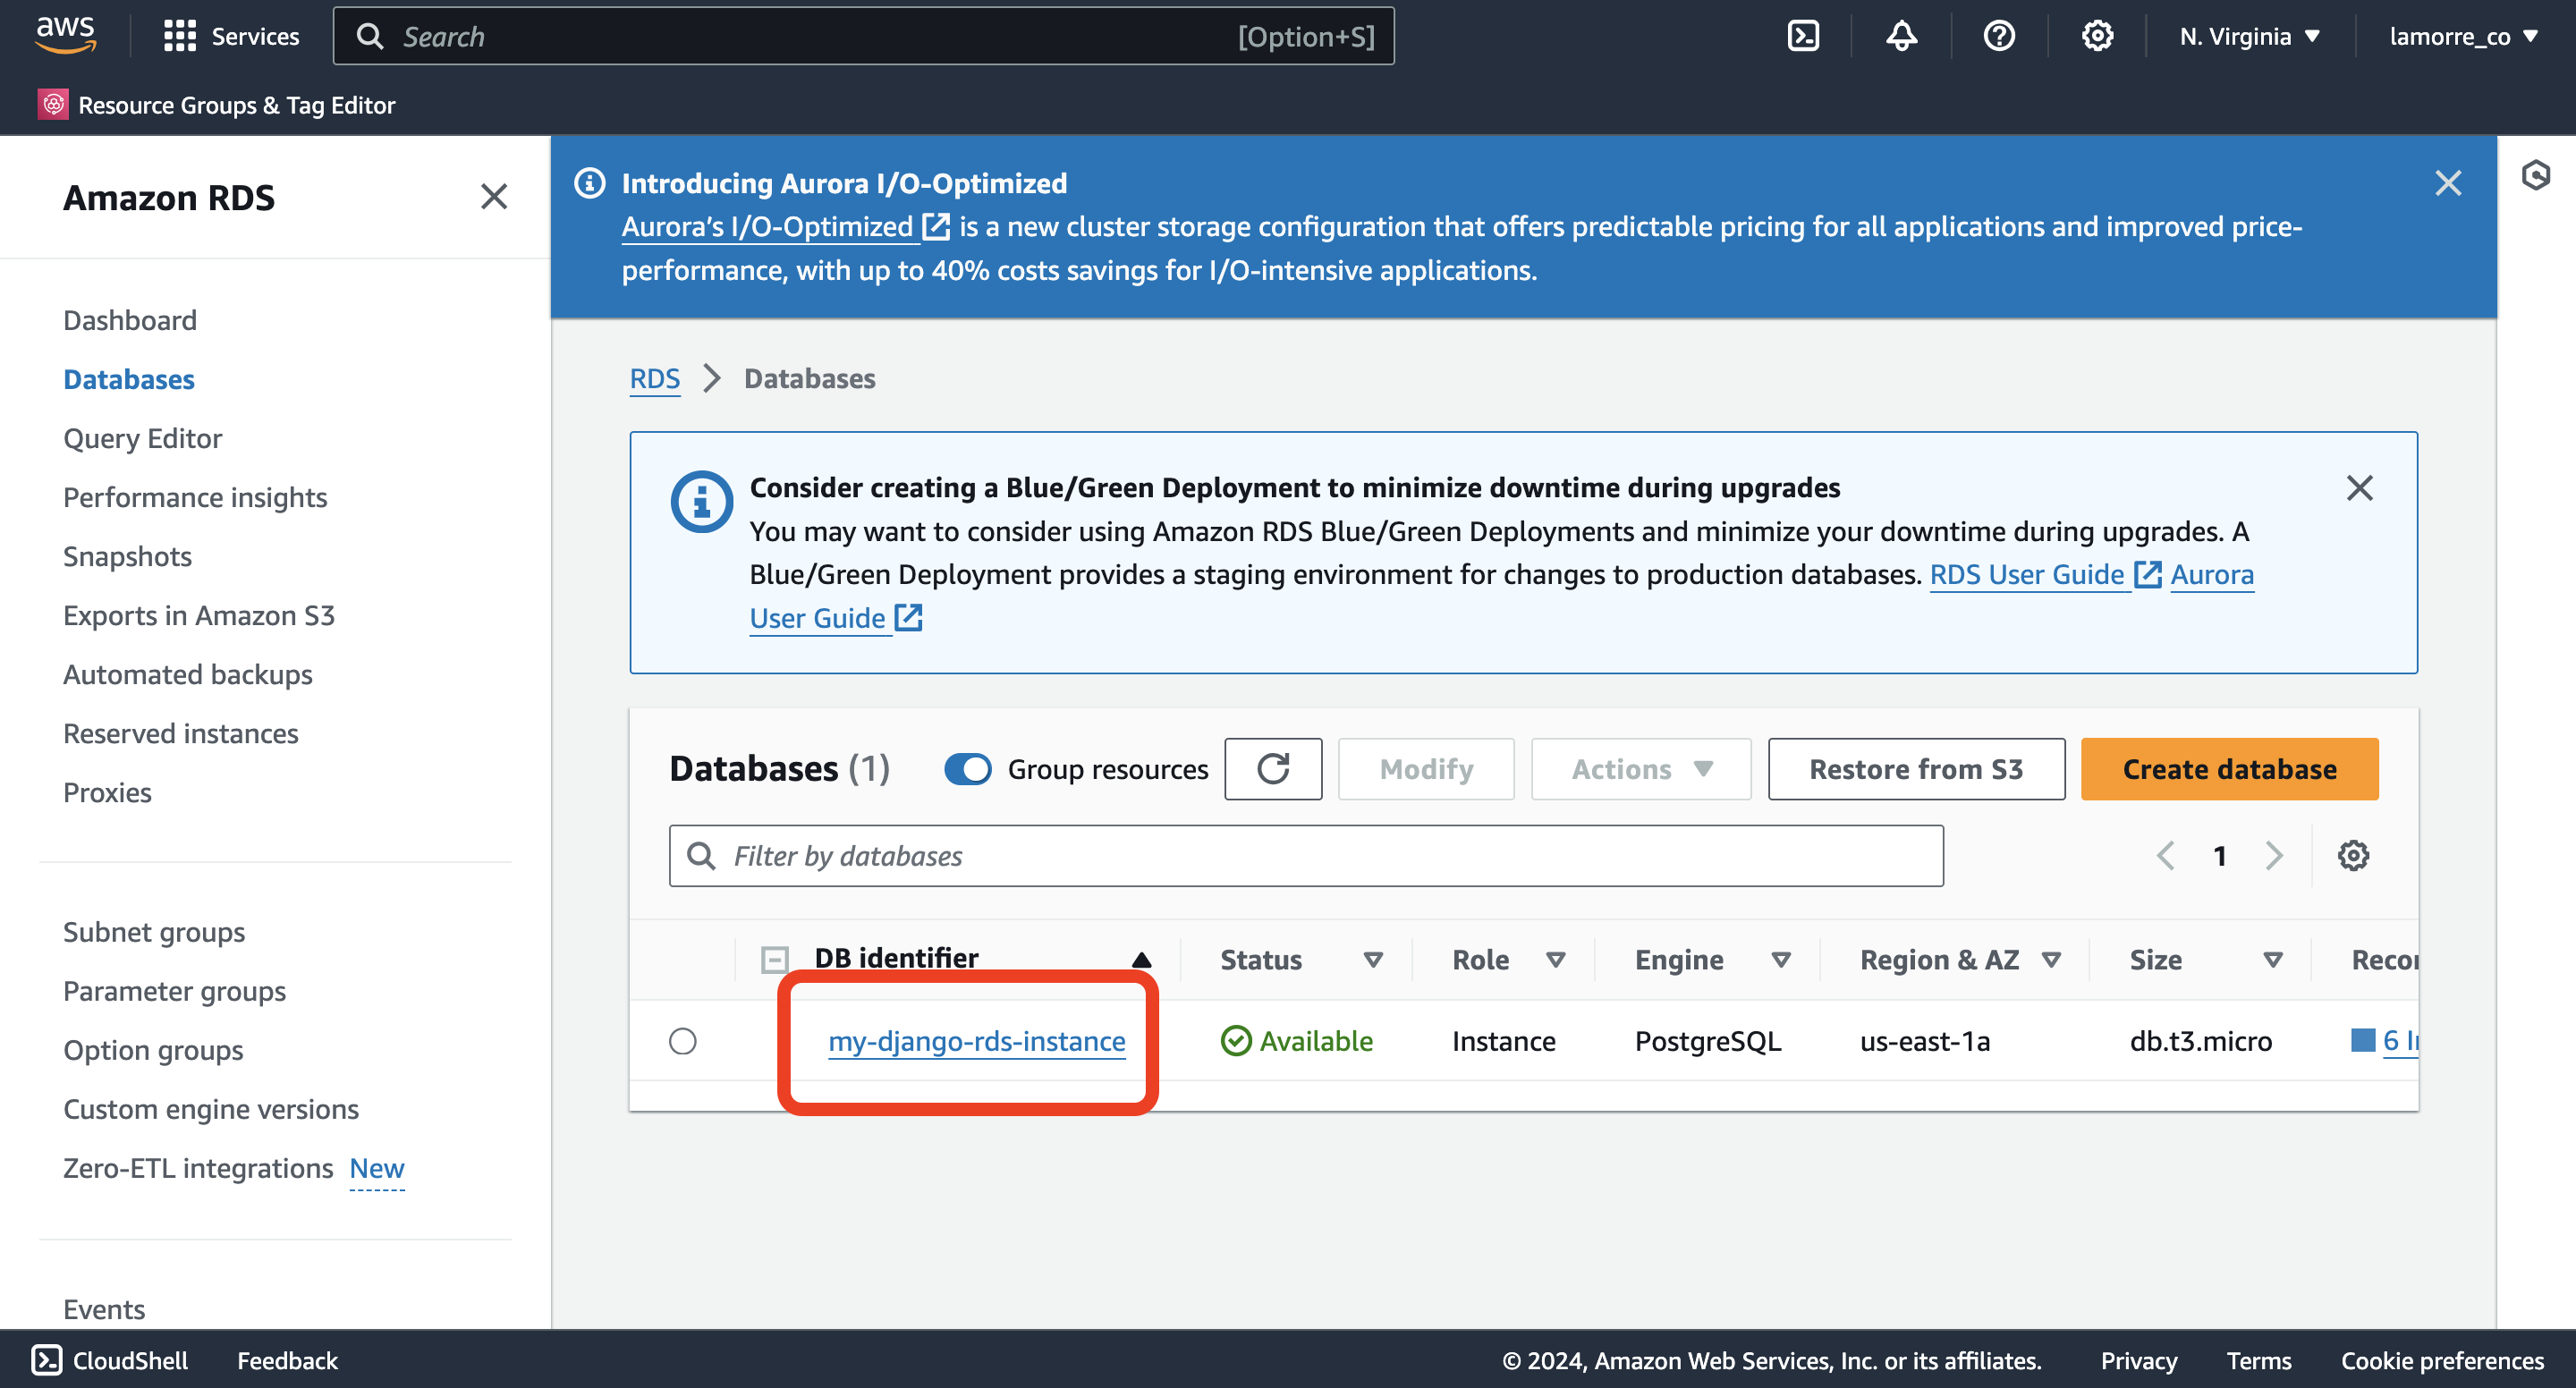
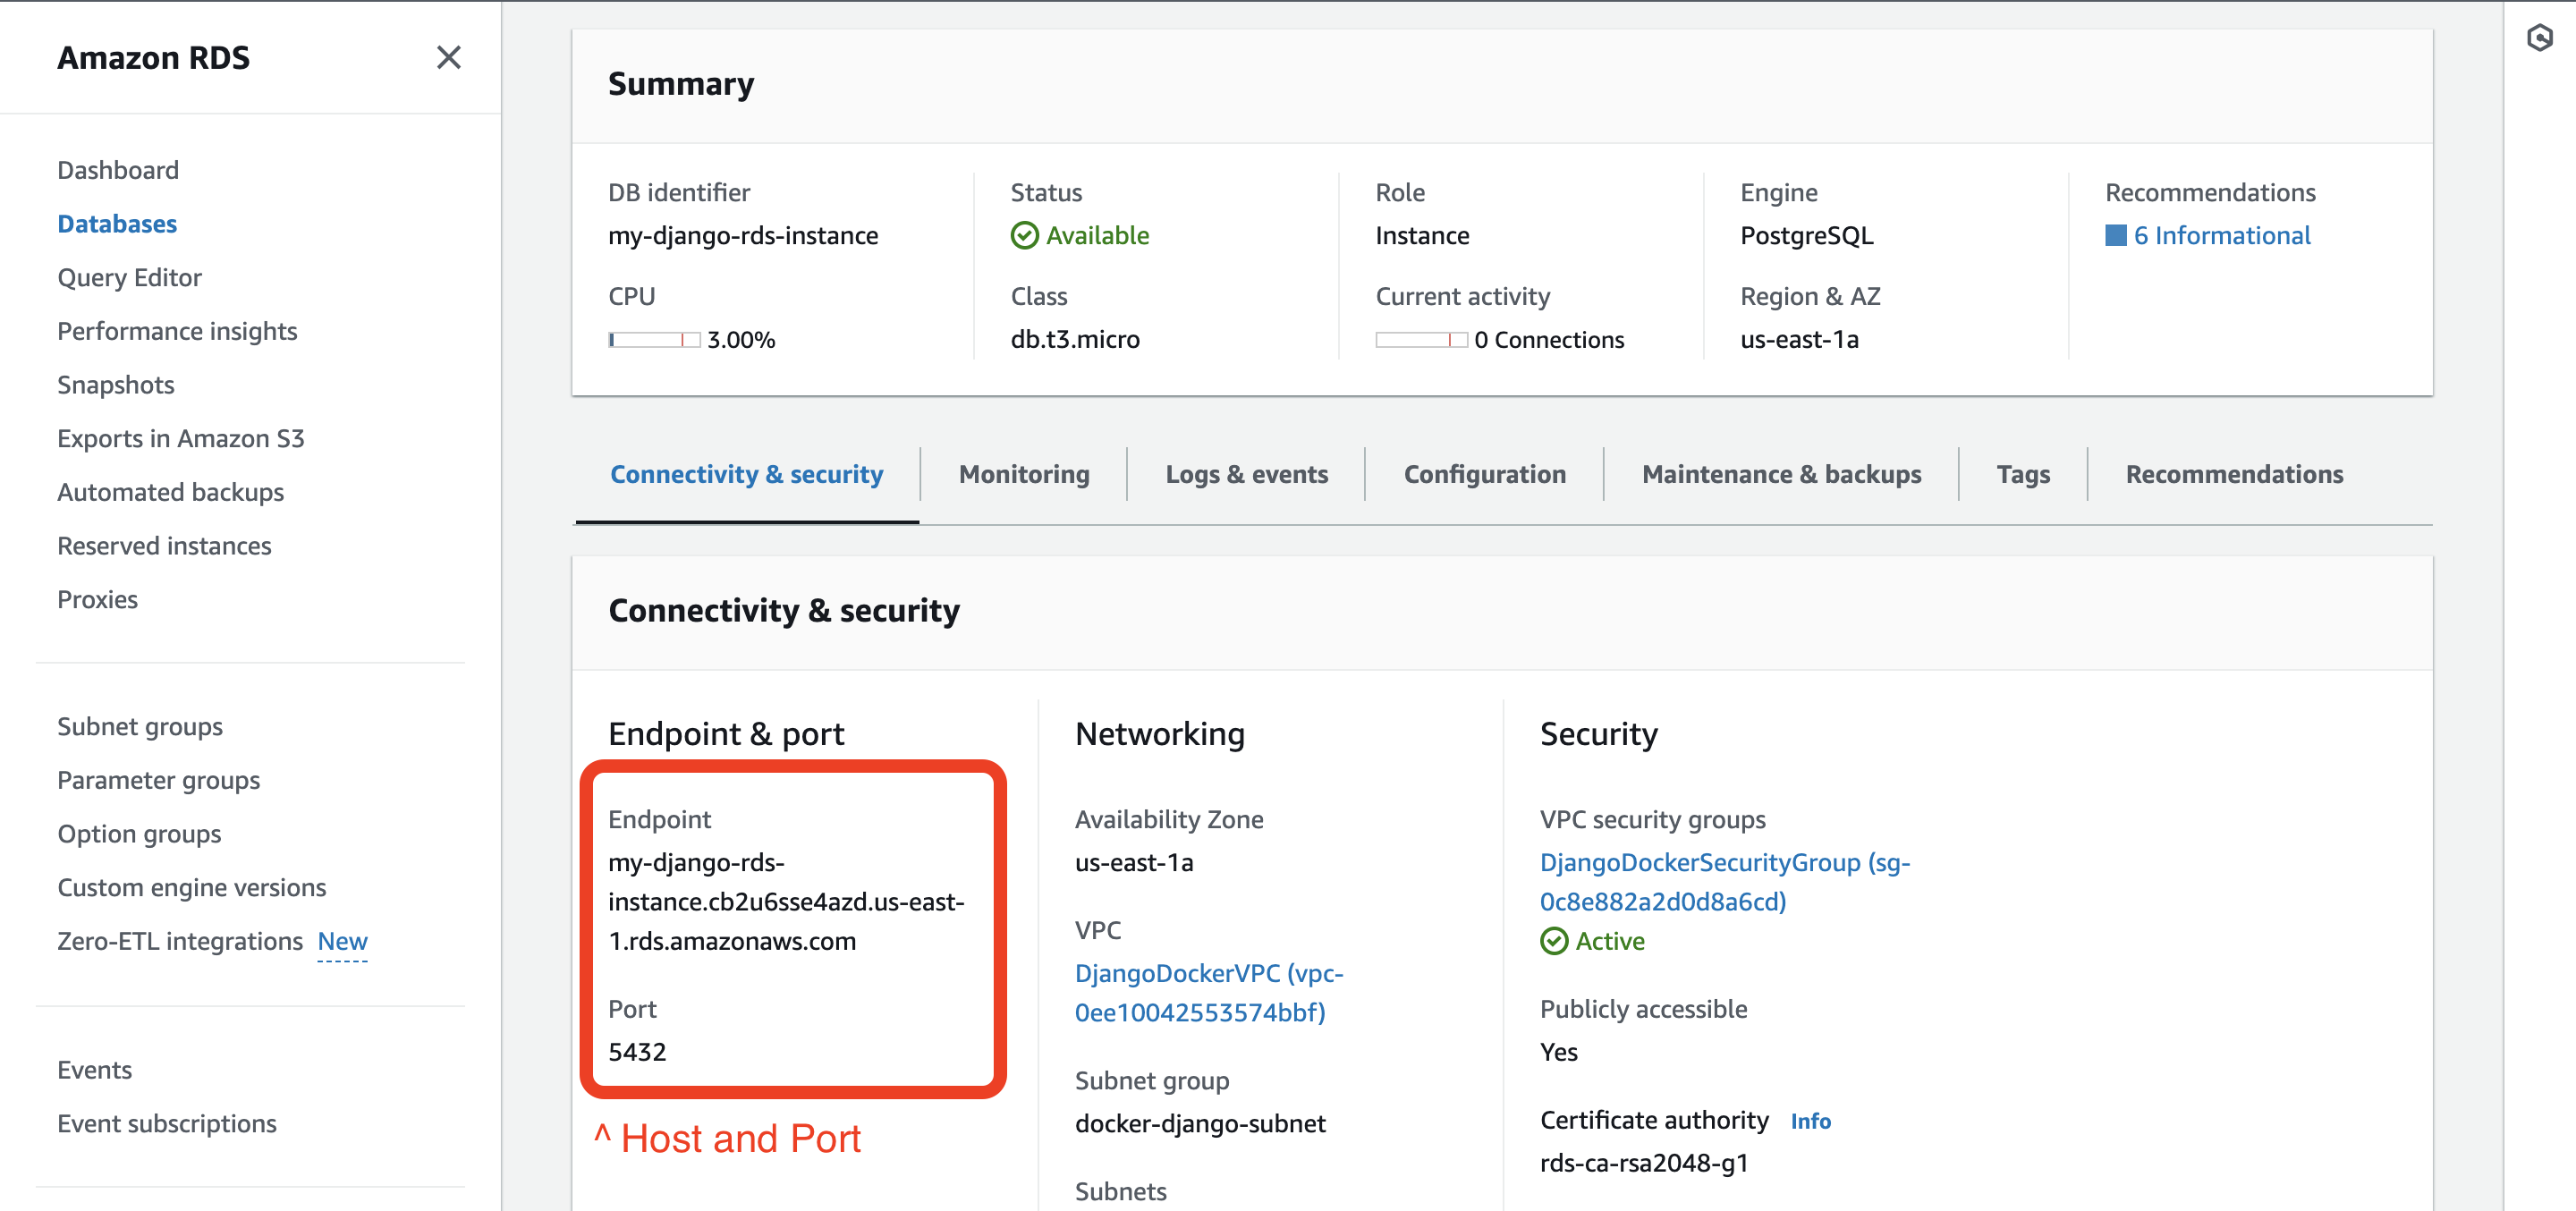
Then you can see the hostname and all relevant info for that Database.
Step 6: Connect Django to the RDS instance
Now that we have a Django Project and a RDS instance, we need to connect the two.
We’re able to do this by updating DATABASES in settings.py. Let’s do this by switching the databases value to the following map:
import os\

...

DATABASES = {
    'default': {
        'ENGINE': 'django.db.backends.postgresql',
        'NAME':     os.getenv("DB_NAME", None),     # name from main.tf
        'USER':     os.getenv("DB_USER_NM", None),  # username from main.tf
        "PASSWORD": os.getenv("DB_USER_PW", None),  # TF_VAR_db_password
        "HOST":     os.getenv("DB_HOST", None),     # RDS hostname from above image
        "PORT":     5432,                           # default PostgreSQL port
    }
}
To pull these values in properly, we need to add them as environment variables and re-activate the virtual environment.
Open up my-venv/bin/activate and add the following code at the end:
export DB_NAME=DjangoRDSDB # from main.tf
export DB_USER_NM=adam # from main.tf
export DB_USER_PW=my_password # TF_VAR_db_password
export DB_HOST=terraform-2024030800.cb2u.us-east-1.rds.amazonaws.com # RDS hostname from above image
How you can reactivate the virtual environment by running deactivate then source my-venv/bin/activate.
Now when we rerun Django with ./manage.py runserver we can go to http://127.0.0.1:8000/admin to test our user was written into AWS’s RDS database.
Next steps:
Next, we should learn how to split up Django into “local” and “production” mode and set up production Django inside Docker. Follow a tutorial on that here.
After that, we should learn to deploy this image and database into AWS as a hosted service. Follow a tutorial on that here.